
Quick Answer: Designing and building a LEGO MOC involves visualizing your concept, sketching ideas, selecting the right pieces, and applying creative techniques like SNOT and color theory. By combining structural planning with artistic enhancements, you can transform simple bricks into unique and impressive creations.
Creating your own LEGO MOC (My Own Creation) is a deeply rewarding experience that allows you to bring your imagination to life, one brick at a time. Whether you’re a seasoned builder or just starting out, the process of designing a unique model requires a blend of creativity, planning, and technical skill. In this guide, we’ll walk through the essential steps to help you conceptualize, sketch, and construct your own original LEGO masterpiece. Along the way, we’ll explore crucial building techniques, artistic enhancements, and color theory to refine your designs. Get ready to take your LEGO-building skills to the next level!
Steps to Create a LEGO MOC
Step 1 – Visualize Your Model
The first and most essential step is to create a rough image or concept of the model in your mind. It’s as simple as that—without this initial mental picture, none of the subsequent creative steps can follow.
Step 2 – Sketch Your Idea

After you’ve visualized the concept, the next important step is sketching it out. The purpose of sketching is to visually communicate your creative ideas. Think of this step as similar to an architect drawing blueprints before building a structure. These sketches serve as the foundation for your upcoming build.
Step 3 – Create a Parts List

Once the sketch is completed, the next step is creating a detailed parts list for your model. The list should clearly specify the colors and types of pieces needed. Having an accurate parts list allows you to efficiently locate the necessary pieces, saving valuable time and streamlining the process of constructing your masterpiece.
Crucial Tip:
While sketching your idea and making your parts list, consider carefully what makes your design unique or special. Identify the highlight or key feature of your model. This helps in strategically applying your building techniques and clearly demonstrates your creativity and skill.
Now, LEGO enthusiasts, what unique building techniques do you have? To inspire your creativity, here are a few method libraries to explore and use as references.
Method Library

The key to gaining more advanced building techniques is practice—continuous, diligent practice.
Carefully studying LEGO instruction manuals from official sets is one of the quickest ways to learn. When assembling official kits, pay close attention to the unique building methods detailed in the manuals. This practice helps you quickly understand the types and features of different LEGO pieces. Also, observe the diverse techniques designers use across various styles.
Once you can combine multiple techniques seamlessly into your own original MOC creations, you’ll have mastered these LEGO building methods well enough to tackle any challenge.
Practical Examples
Case Study 1 – Building a Cube
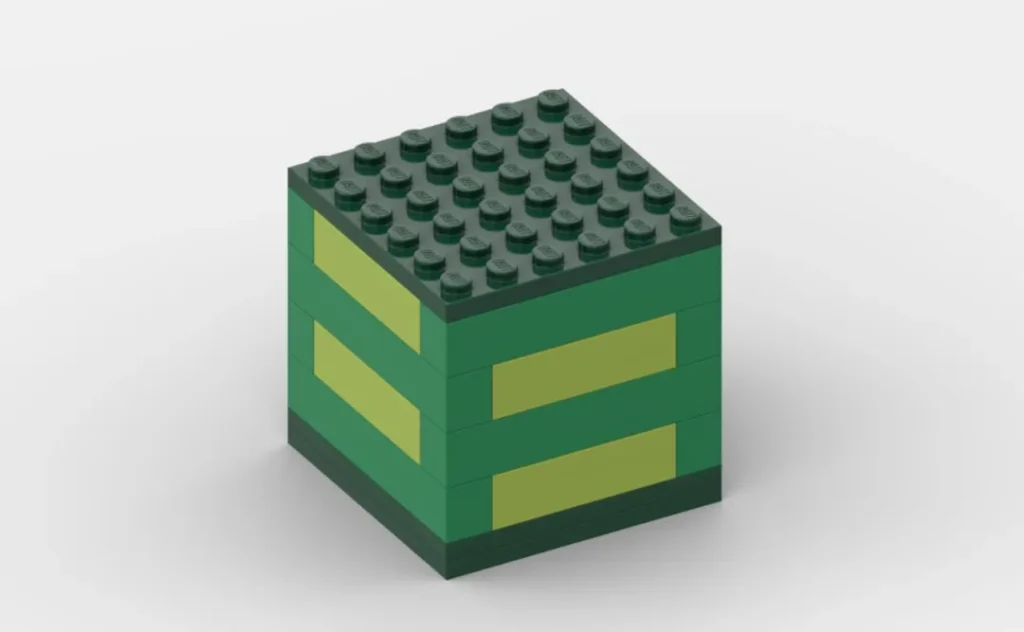
Typically, the LEGO bricks we encounter are basic pieces with studs pointing upwards. By stacking these square-shaped bricks in an interlocking fashion and carefully measuring dimensions, it’s easy to build a cube from the bottom up.
However, if you want a cube with studs visible on all six sides, you will need to use the SNOT (Studs Not On Top) building technique. By strategically placing LEGO elements inside the cube using SNOT methods, you can achieve a cube with studs facing outward on all sides. What other creative scenarios do you think could benefit from this versatile technique?
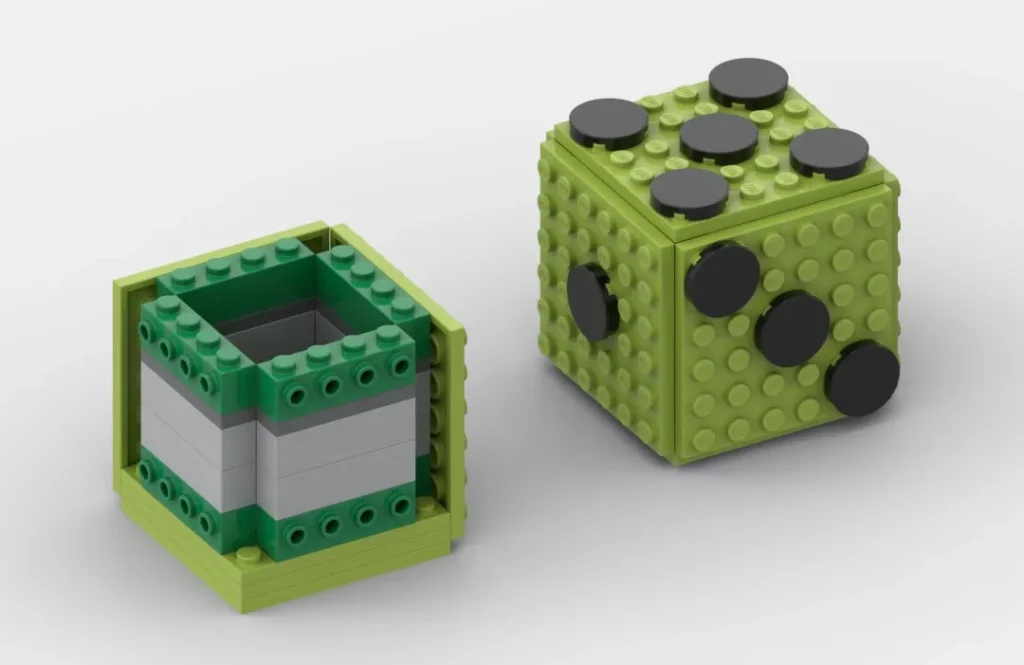
Case Study 2 – SNOT 2:5 Rule
Since we’ve mentioned the SNOT technique, let’s explore an essential mathematical principle behind it—the 2:5 rule.
So, what exactly is the 2:5 rule? If you stack four studded plates vertically and add a smooth tile on top, then place this stack horizontally, you’ll notice its width matches exactly the width of two standard studs placed normally.

Remembering this critical rule allows you to design intricate internal structures and extra details using SNOT bricks in your builds.
For instance, two plates plus one SNOT brick with side studs, when vertically assembled, perfectly align with the distance of two standard studs. By applying this rule, you can precisely calculate distances, such as ten-stud lengths, enhancing your ability to create sophisticated, detailed models. What creative applications can you think of for the 2:5 rule?
Practice with a LEGO Set
A skilled LEGO builder needs proficiency in various building styles, techniques, and methods.
For example, combining Technic elements with standard bricks can add dynamic features and increase structural integrity in your creations.
Consider the LEGO® Star Wars 75318 “The Child” set; its internal structure exemplifies an excellent blend of Technic and basic brick elements.

Review your collection of LEGO sets and identify innovative building methods that stand out. Refresh your current skills and techniques, then apply your new insights and knowledge from these sets into creating original and imaginative MOCs.
Important Tips:
- Mark any new techniques discovered during your building process.
- Recreate prototypes of these new techniques.
- Assess the scalability and adaptability of these techniques.
- Go beyond the original instructions—use them as a foundation and creatively elevate your builds to new heights.
Artistic Enhancement
A great MOC can achieve impressive effects through artistic enhancement. Focus on mastering these four aspects to bring your creation closer to success:
- Two-dimensional: Observe your creation from a flat, planar perspective.
- Three-Dimensional: Evaluate your work from a complete, spatial viewpoint.
- Character: Give emotional value and personality to your creation.
- Color: Use colors effectively to create visual impact and capture attention.
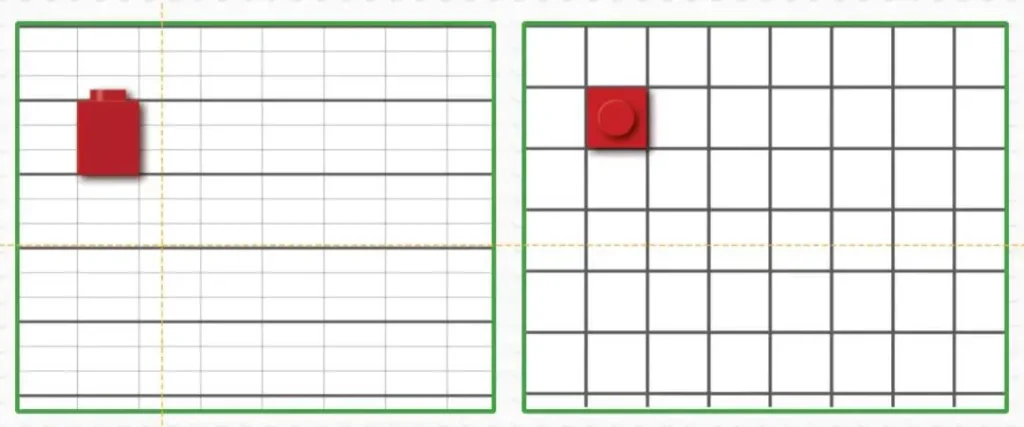
Building diagrams for LEGO MOCs typically represent bricks with studs facing upward. However, blueprints also benefit from illustrating side orientations. LEGO blueprint diagrams, with clear stud orientations, enable you to quickly identify the dimensions and shapes of bricks. Mastering this skill helps accurately plan and execute complex designs.

Using brick diagrams can conveniently help you sketch your LEGO models directly. This approach clearly shows the placement of bricks and plates, enabling you to see areas precisely where each piece should be positioned. Using LEGO blueprint diagrams streamlines your building process, helping you quickly identify brick sizes and shapes, accurately plan, and creatively execute complex designs.
Two-Dimensional and Three-Dimensional Observation
You can conveniently draw your models directly on LEGO brick diagrams from multiple perspectives—either “stud up” or “stud forward.” These diagrams help quickly identify exact positions for bricks and plates, facilitating a clearer understanding of dimensions and shapes. Leveraging multi-perspective views, you can incorporate unique elements such as angled or curved bricks, enhancing your designs aesthetically. For example, in a textual illustration, arch bricks might be strategically placed at corners to beautify and enhance the overall appearance of the model.
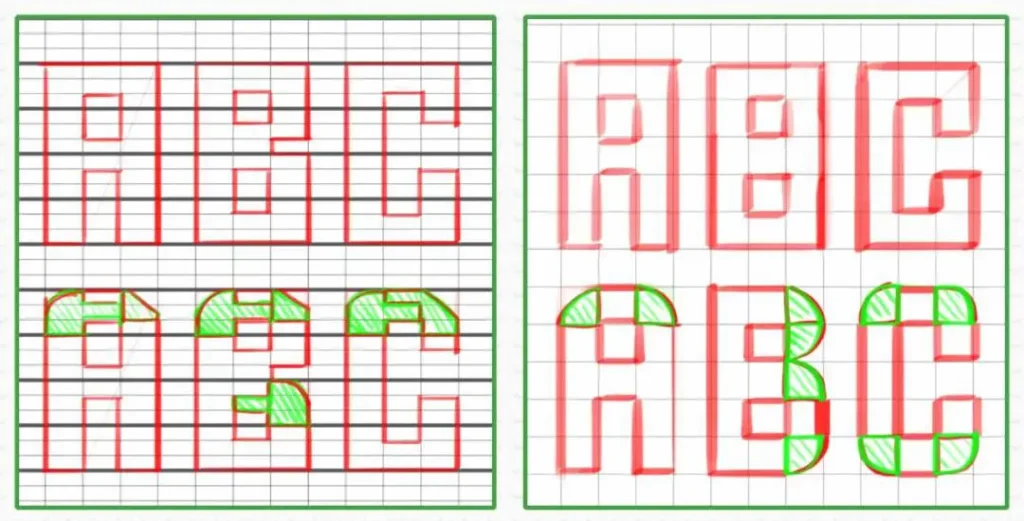
After creating a two-dimensional drawing on a LEGO brick diagram, use three-dimensional observation to examine your design from both top-view and side-view perspectives. This helps ensure correct proportions, identify positions for bricks and plates accurately, and discover potential areas for creative enhancements. By integrating unique elements like angled or curved bricks, such as arch bricks at corners, your model’s overall aesthetic and design complexity can be greatly improved.
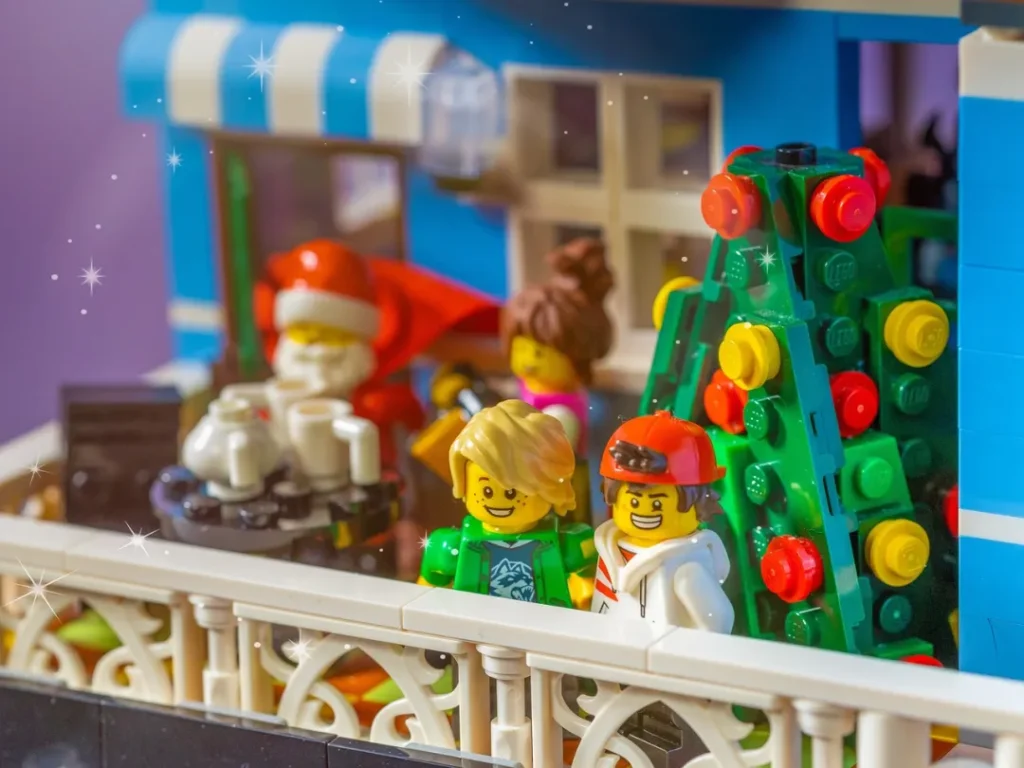
Adding Character
Once you’ve established the basic shape and form of your model, it’s time to elevate your creation to a new level. Adding character to your build is a fantastic approach. Consider your ultimate goal and how your design can clearly express it. Thoughtful character additions help your MOC tell a compelling story, making your work truly memorable.

Characters can hold different meanings depending on whether your model is an “organic whole,” with a scene or background included. For example, creating a smiling character with wide-open eyes can convey happiness, whereas frowning eyebrows or squinted eyes can depict anger. You can also express emotions through body language, such as crossed arms indicating negative feelings or open arms suggesting positivity.
The scale of the characters and the scene are directly related. For example, when designing a cityscape, you might shape the characters through facial details or specific poses. However, you can also enhance the tension and emotion of the creation by adding intricate details to the city itself.
Will this be a utopian society? You could incorporate more greenery, cheerful expressions, and clean architectural facades. On the other hand, for a post-apocalyptic city, you might need to include more signs of destruction and decay.
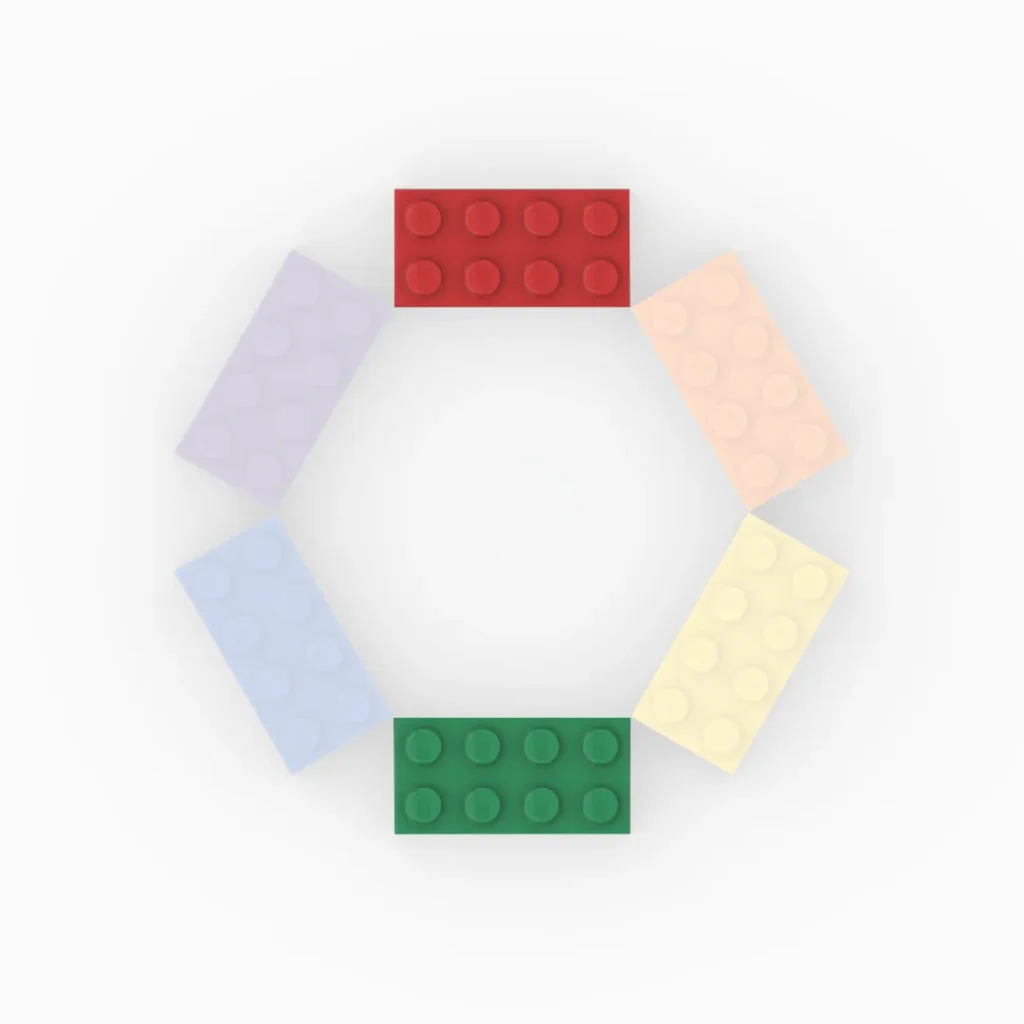
Color Theory
Understanding the basics of color theory is extremely helpful when designing MOCs. Grasping color principles and fundamental concepts helps you choose the most suitable colors for your model building, which can have a huge impact on the visual effect, and can save you a lot of time on complex building techniques.
Before you start building, you need to design a color scheme. Several factors will influence your color choices, such as the intuitive feeling you want the model to convey (e.g., warm and cool color contrasts). The following pages contain some useful definitions.
Primary Colors
Red, yellow, and blue.
These are the 3 main colors that create all other colors.
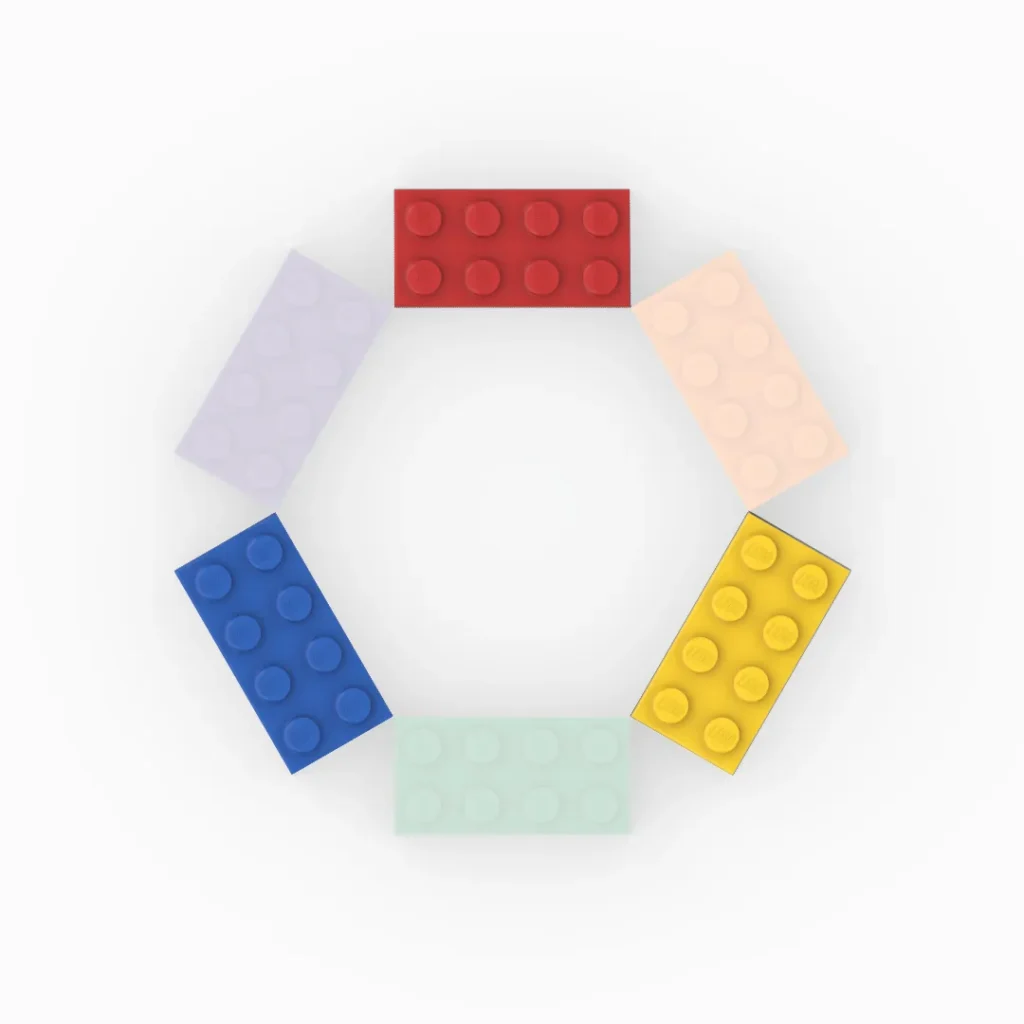
Secondary Colors
Green, orange, and purple.
These 3 secondary colors are created when two primary colors are mixed together.

Analogous Colors
These are the three colors that are next to each other on the color wheel, such as orange, yellow, and green, or red, purple, and blue. The gradual hue transition between analogous colors creates a natural and soft visual effect.

Complementary Colors
These are two completely complementary colors that are directly opposite each other on the color wheel, such as red and green, or blue and orange. This combination creates a strong contrast and presents a visual impact.
Palette
Creating a palette is a useful tool. You can select color combinations to form gradients, so you can visually see how they look next to each other and make adjustments as needed.

Color Grids
Complementary to the palette is the color grid. For a color grid, you stack colors like stacking bricks in a palette, but you combine them according to how much of each color you will be using. So, if your model has more red, it will be stacked higher than other colors. When you look at the color grid, you will know how to better use the colors in your model and help you make adjustments based on what you see.
The colors of the bricks are limited. With this in mind, we will use colors that build well together—this is called color harmony.
Choosing strong colors conveys the purpose and feelings you want to achieve in your build, which is called expressive color.
Appropriate color selection can bring a sense of futurism, history, anxiety, and other feelings and atmospheres to your model.
Now that you’ve learned the essential steps to creating a LEGO MOC, it’s time to put your creativity into action! Have you experimented with any of these techniques before? Do you have any unique building methods or color strategies that set your creations apart? Share your thoughts, ideas, and experiences in the comments below—let’s inspire and learn from each other in this ever-evolving world of LEGO artistry! 🚀


33 Responses
How To Enter (Both Required):
1. Do you have any MOC sets you’ve designed yourself, and do you have any technique share codes? Let us know! Or any other topic you want Samon to write about in detail.
2. Share this article on any of your social media platforms.
Giveaway prize:
1st Prize (2 winners): Random JMBricklayer product
2nd Prize (3 winners): 40% off discount code
Giveaway Details
1. The giveaway is open to participants worldwide.
2. The Event ends on March 31st.
3. Each comment earns you an extra entry. The more entries, the more chances to win!
4. Winners will be randomly selected and announced on April 1st.
5. To claim the prize, winners must provide proof of their social media share(a screenshot or link).
6. Comments will be checked for ads, displayed after backend review, usually within 12 hours.
I have done edits on existing sets and am currently working on moc build to help tie other sets I’ve purchased together. Making a moc does take alot of work but it’s so rewarding when it all comes together
very nice and useful
I Just started Building on past Summer cause my ankle brOke and casually found JMBricklayer Group on Facebook.
I really appreciated all the bricks products that I built up till now ( loooooots ), but , cause newbee , I really do not feel ready for MOCS ( even if I admire Who Is able to create It …. ). Hope in a short future to be able to….
You still might one day the more you use the parts you’ll think about how they all connect and then you’ll be building your own. it’s difficult at first but just even editing builds will help you learn them.
I was really good at it as a kid. I built entire cities, cars, robots, etc. Unfortunately I no longer have this creativity, maybe it will come back through my children
Imagination helped alot as kid they have found alot of was to add in more shaped blocks now that help them look more real. My mini figs back in the day slept on 2-2×4 with 2-1×2s as pillows lol
I do not, but I’ve been following some Star Wars related recently.
As I said in the upper comment, MOC ain’t for me now. I don’t have time to do it as decribet on top of the page, I would succed maybe after a year, But… I suggest the use of the AI programs. upload a scan list of all the pieces at your disposal and then describe the desired result
Have you tried creating a build with the help of an AI? Just curious 🙂
I admit, as the previous participants that commented, to do MOC first of the two capital rules : You need time, the second- Creativity. I lack the first, as I need to work for my income, I think I still have the second one. Life and time will tell, if not soon then I’ll try as retired maybe with nephews
Agree time is a hard part, the older I get I just keep asking myself why can’t I just play with blocks and still earn a living. Dreams
Creating stories is the best thing!
Another great article, tips and examples for its readers!
My creativity has definitely improved since I was a kid however not really with legos, it’s a whole other level with lego pieces. I prefer to follow the booklet instructions & use my creativity/make our own designs in group work fun settings.
I love the pictures in the article, they are spot on and funny. Good job JMB-Samon!
Im less of a technique guy and more of a feeling guy lol
The practical examples aren’t as easy as it looks :p Would def take me longer than the average person to get it right 🙂
These tips and tricks come in really handy.
I do not. Thanks for this article
I do not. Thanks for this article
When i was kid i built a lot, now i don’t have time. Thank you
A very informative read,i enjoy thinking of new Lego Designs
I have not done any MOC sets but my son and grandson have.
The color theory goes over my head lol if I where to ever design my own lego.
My motivation anything legos now is my nephews, otherwise there is not much of building on my own.
Such a wonderful company with a nice production of sets, just knew you guys
I have not done any MOC lego sets, however my nephew has 🙂
Love the colour theory!
I agree with the story telling of lego builds 🙂
That’s what makes the builds unique!
There is no MOC, and I don’t plan to. I’m excluding all AI from my life for now. As a child, and a few years ago, we even built with my nephew. He’s an adult now. Also, I don’t have much free time to do anything other than work. If we have time, we spend it traveling. I’m staying analog in the digital world.
I’ll be trying the color theory in the future!
Neat article with great information!